Run NGC container in Windows 11
I’m a big server Linux fan and have used laptop macOS for over 10 years now for its unix like shell. Windows has now the famous Windows Subsystem for Linux, time to give it a shot! Furthermore, I want also escape Docker Desktop fees… Let’s try something fancy.
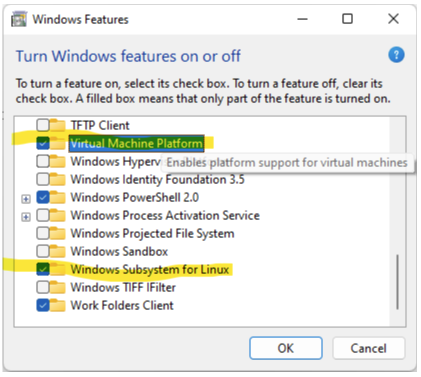
First step is to activate WSL on your Win11 box. So, to do that you need to enable 2 features like below:
Followed in command prompt: wsl --install --distribution Ubuntu-20.04
To run containers, we need to install podman. It’s a free open source docker engine alternative. If you hope to use docker-ce in wsl you wrong, it needs Docker Desktop that is not free if you’re working for large enterprise.
Within WSL shell:
# source /etc/os-release
# sh -c "echo 'deb http://download.opensuse.org/repositories/devel:/kubic:/libcontainers:/stable/xUbuntu_${VERSION_ID}/ /' > /etc/apt/sources.list.d/devel:kubic:libcontainers:stable.list"
# wget -nv https://download.opensuse.org/repositories/devel:kubic:libcontainers:stable/xUbuntu_${VERSION_ID}/Release.key -O- | apt-key add -
# apt-get update -qq -y
# apt-get -qq --yes install podman
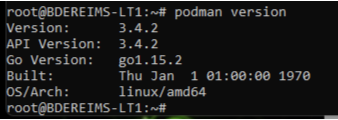
# podman version
You should get:
You have to set default registry:
# echo 'unqualified-search-registries = ["docker.io"]' | sudo tee /etc/containers/registries.conf
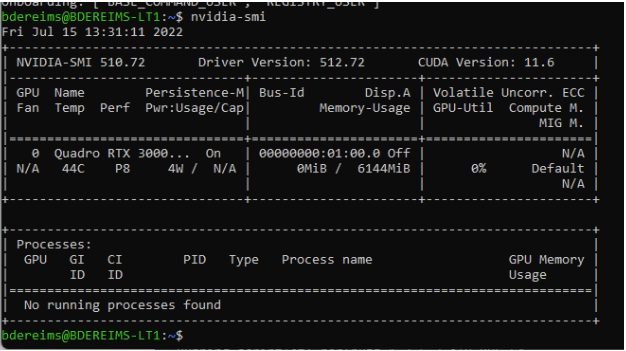
Verify that nvidia driver is working propely: # nvidia-smi, you should get something like:
Install nvidia-container-toolkit (cf. https://github.com/henrymai/podman_wsl2_cuda_rootless )
Modify file /etc/nvidia-container-runtime/config.toml like this:
disable-require = false
#swarm-resource = "DOCKER_RESOURCE_GPU"
#accept-nvidia-visible-devices-envvar-when-unprivileged = true
#accept-nvidia-visible-devices-as-volume-mounts = false

[nvidia-container-cli]
#root = "/run/nvidia/driver"
#path = "/usr/bin/nvidia-container-cli"
environment = []
#debug = "/var/log/nvidia-container-toolkit.log"
#ldcache = "/etc/ld.so.cache"
load-kmods = true
#no-cgroups = false
no-cgroups = true
#user = "root:video"
ldconfig = "@/sbin/ldconfig.real"

[nvidia-container-runtime]
#debug = "/var/log/nvidia-container-runtime.log"
debug = "~/.local/nvidia-container-runtime.log"
log-level = "info"

# Specify the runtimes to consider. This list is processed in order and the PATH
# searched for matching executables unless the entry is an absolute path.
runtimes = [
    "docker-runc",
    "runc",
]

mode = "auto"

[nvidia-container-runtime.modes.csv]
mount-spec-path = "/etc/nvidia-container-runtime/host-files-for-container.d"
Configure hook with this lines:
Configure hook

sudo -i
mkdir -p /usr/share/containers/oci/hooks.d/
cat << EOF | sudo tee /usr/share/containers/oci/hooks.d/oci-nvidia-hook.json
{
    "version": "1.0.0",
    "hook": {
        "path": "/usr/bin/nvidia-container-toolkit",
        "args": ["nvidia-container-toolkit", "prestart"],
        "env": [
            "PATH=/usr/local/sbin:/usr/local/bin:/usr/sbin:/usr/bin:/sbin:/bin"
        ]
    },
    "when": {
        "always": true,
        "commands": [".*"]
    },
    "stages": ["prestart"]
}
EOF
Last step for configuration is to increase limits defined in /etc/security/limits.conf like below, replace [your-user] by what returns whoami:
[your-user] soft memlock unlimited
[your-user] hard memlock unlimited
[your-user] soft stack 65536
[your-user] hard stack 65536
If you not yet familiar with that is NGC, it’s time to visite NGC Catalog and the getting started. Create your account and install ngc cli.
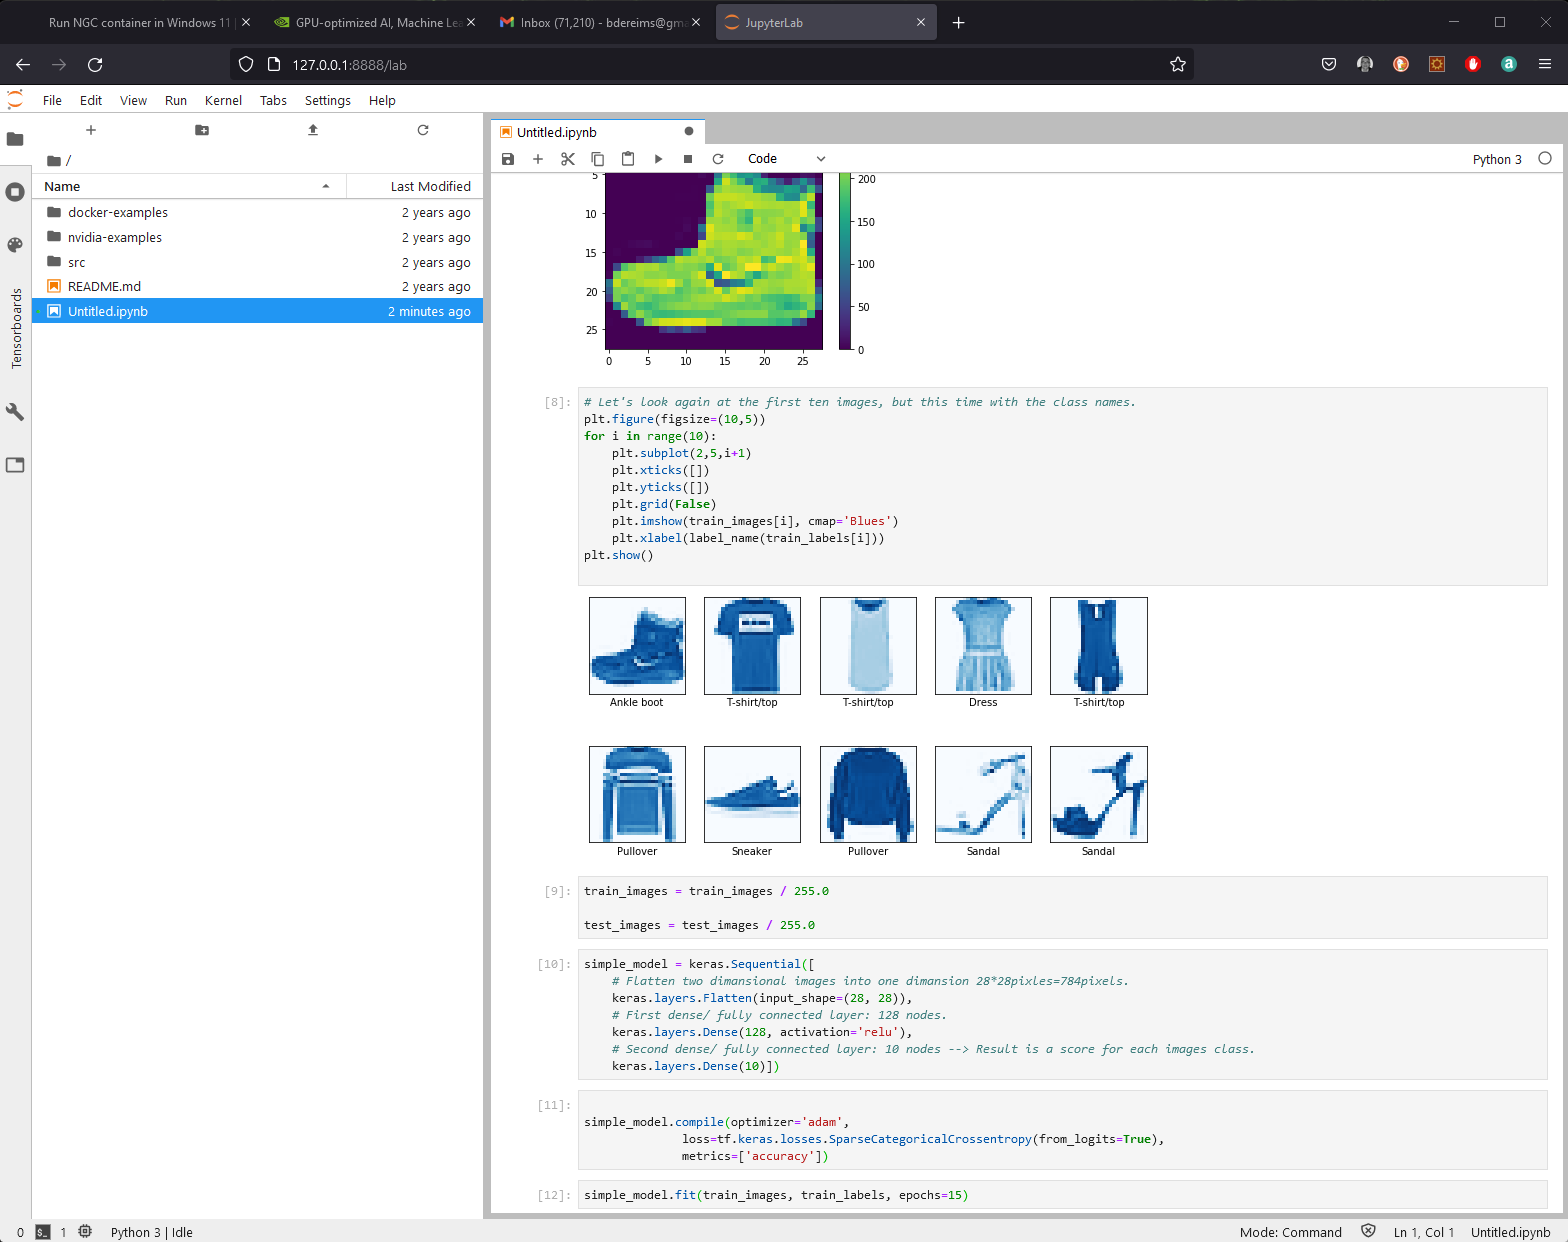
Let’s try this example.
Launch example with: podman run -it --gpus all -p 8888:8888 -v $PWD:/projects --network=host nvcr.io/nvidia/tensorflow:20.08-tf1-py3 and follow jupyter notebook. You should able to run example:
Conclusion:
- podman on wsl works great
- with ngc container running localy, it’s easy to learn and test ML/AI topics
- first step before to work with large scale environnement like Base Command